Browser push notifications have become a mainstream solution for bloggers & websites owners to bring back their one-time visitors and convert them into steady readers.
However, many newbies who are using these services (like PushEngage, Letreach,Pushcrew, or any other) make a major mistake of not setting up their Firebase messaging key. This becomes a big problem when switching push notification providers.
Here at ShoutMeLoud, I use PushEngage for sending push notifications & they are pretty solid. I have already shared a detailed guide on setting up push notifications for your website with PushEngage over here. If you haven’t done that yet, you should do it right away.
But in this tutorial, we will look at setting up a Firebase project server key & project ID.
Now the obvious question is:
Setting up your own Firebase Cloud Messaging sender ID is very important. When you are using the default key of your push notification service (free or paid), if you ever move to some other service, you won’t be able to migrate your existing subscribers.
You can imagine how big of a loss this would be.
When you are setting up push notifications for your website & you use your own Firebase Cloud Messaging sender ID, you can easily move from one service to another in the future without losing your existing subscribers.
So now that we’re on the same page, let’s follow the steps to set up our Google Cloud Messaging key (GCM key).
How To Own Your Push Notification Subscribers: Tutorial
Head over to the Firebase console page & log in using your existing Google ID.
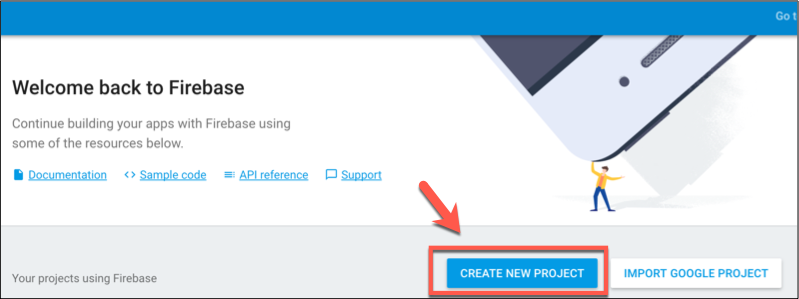
Click on “Create New Project”.
On the pop-up, give a meaningful name to the project. Something like “(domain name) Push”.
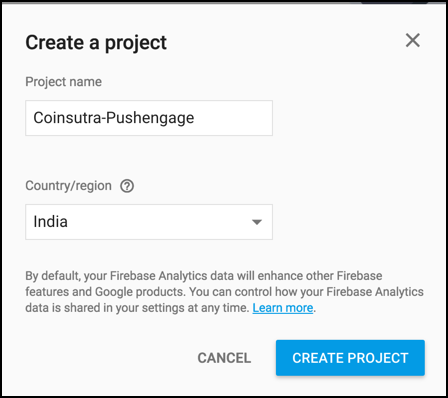
It will take a few seconds to create the project & it will automatically redirect you to the project dashboard.
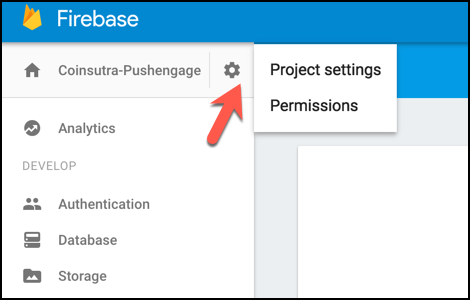
Now, on the left-hand side, click on the “gear” icon & select “Project settings”.
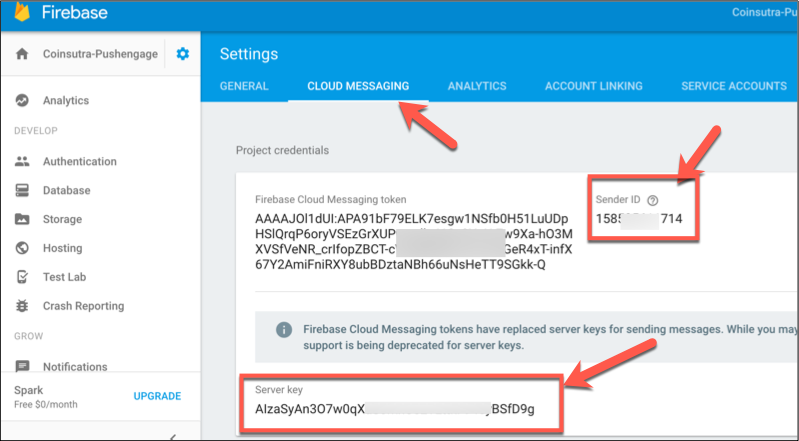
On the next page, click on “Cloud Messaging” & you will find your “Sender ID” & “Server key”.
That’s it. Wasn’t that simple?
Wondering what to do next?
Well, if you are using PushEngage, simply log in to your dashboard:
Go to Settings > GCM settings/FCM Settings & copy/paste the “GCM API Key or FCM Server Key” & “GCM Project Key or FCM Sender ID” value.
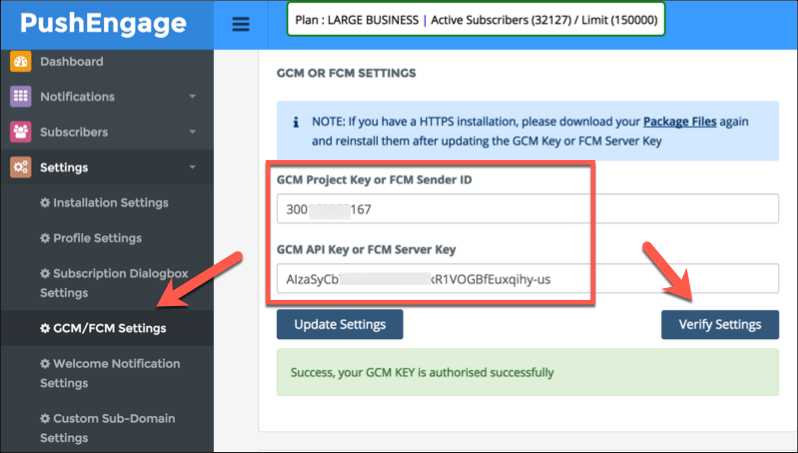
Then click on “Verify Settings” to ensure everything is working fine.
Here are a few common questions:
Note: This is based on my experience with PushEngage. For other services, it could be different.
Q: What will happen to the existing subscribers after setting up the Firebase messaging key?
A: Nothing; they will keep receiving updates.
Q: What else do you need to ensure you can migrate services?
A: You should definitely configure your own sub-domain. This is vital if you wish to port your existing subscribers.
Q: What will happen if I move from HTTP to HTTPS (your own sub-domain for push notifications)?
A: PushEngage uses a technique to ensure duplicates don’t happen. However, there is a chance that a few subscribers will subscribe via your sub-domain. This will cause them to receive dual notifications & could be annoying. However, as I said, PushEngage tries to minimize this, but it’s not possible to avoid it 100%. Your best bet is to shift to your own sub-domain as fast as possible for serving push notifications.
Q: How do you move to your own sub-domain (HTTPS) for push notifications?
A: I will cover this in an upcoming tutorial.
I also had a quick word with the PushEngage CEO “Ravi Trivedi” regarding upcoming features & some of them sound pretty exciting:
The transparency & ability for users to port makes me admire the team behind PushEngage. There are also other similarly good services that you can consider using as well (mentioned in the beginning of this post).
Again, if you haven’t set up push notifications, you should definitely do that.
I hope this guide helps you understand the technical aspects of push notification services. If you have any queries, feel free to ask me in the comments below.
Don’t forget to share this post!

No comments:
Post a Comment